H2Osolutions FL I Plumbing Services | Best Miami Plumber
 (786) 627-94-72
H2Osolutions FL I Plumbing Services | Best Miami Plumber
(786) 627-94-72
In a properly engineered environment, this task is binary: it either functions as a 10-30 minute maintenance routine, or it reveals a system failure due to heavy calcification or improper installation that requires professional correction [1, 2]. Our objective is to clear the flow path without compromising the waterproof integrity of the shower pan or the mechanical seal of the drain body.
Before proceeding, we establish a strict boundary for residential maintenance. If the cover does not move after 15 minutes of standard effort, or if you encounter any "Red Flags" listed below, the risk of structural damage to the subfloor outweighs the cost of a service call.
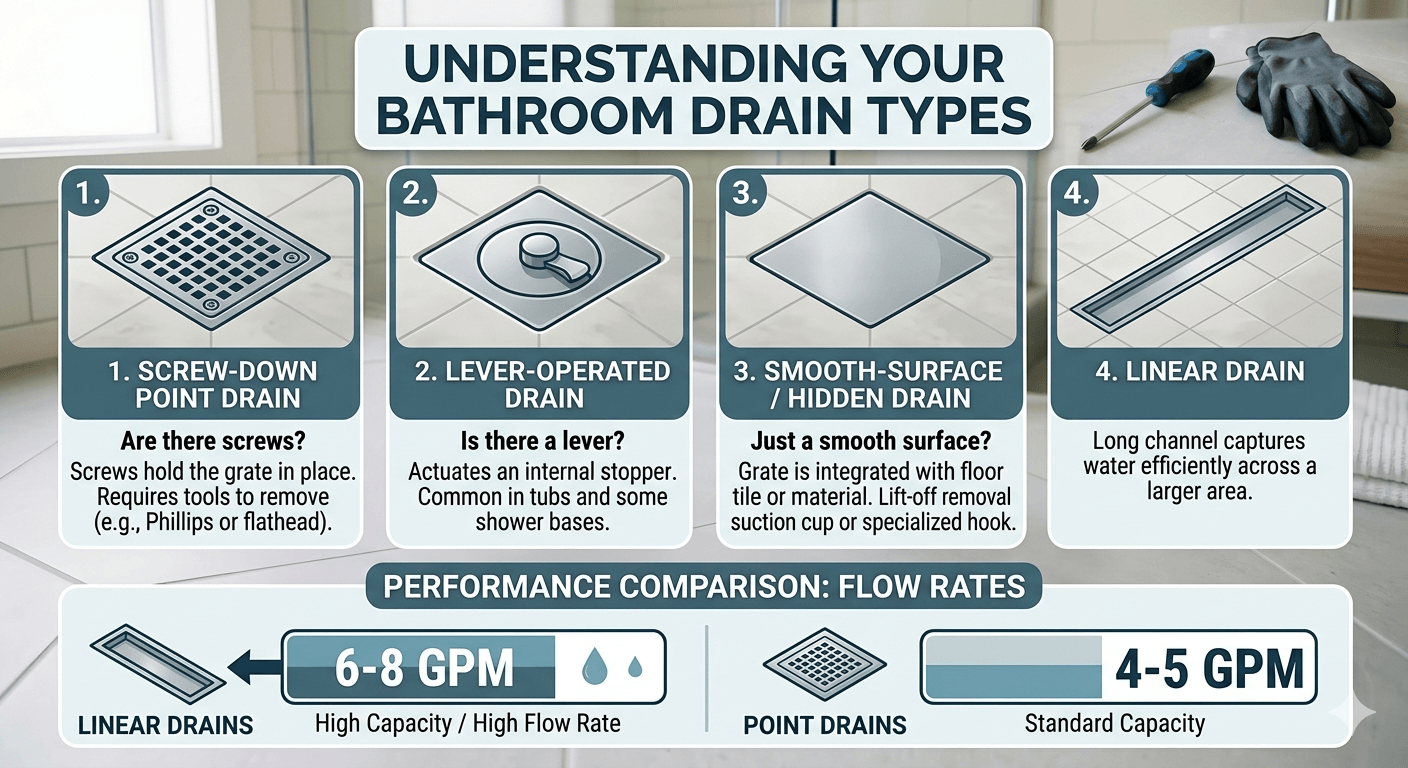
Before applying torque (rotational force), we must identify the mechanical interface of the fixture. Residential drainage in South Florida generally follows one of four engineering archetypes:
| Feature | Drain Type | Engineering Logic |
|---|---|---|
| Visible surface fasteners | Screw-in | Mechanical compression via 304/316 stainless screws. |
| Flush surface, no fasteners | Snap-in | Friction-fit using spring-tension clips. |
| Central articulating knob | Lift-and-turn | Internal threaded stem with a friction plug. |
| Rectangular longitudinal grate | Linear drain | High-capacity gravity flow (6-8 GPM) [9]. |
Quick guide: what tool do you need right now?
The primary risk here is losing hardware into the P-trap.
1. Block the void: place a rag over the drain. If a screw falls into a 2-inch pipe, a 10-minute task becomes a 2-hour recovery mission.
2. Apply torque: use firm vertical downward force while rotating counterclockwise to prevent "cam-out" (stripping the screw head).
3. Extraction: lift the stainless steel grate vertically. If it resists, do not pry; check for hidden sealant or grout overlapping the edges.
These rely on tension clips. The danger here is not the drain itself, but the surrounding shower pan.
1. Locate the notch: find the engineered pry-point along the perimeter.
2. Protect the substrate: place a cloth under your flathead screwdriver to distribute the load and prevent scratching the acrylic or tile.
3. Leverage: apply gentle upward pressure. The cover should "pop" as the tension clips release.

Safe lever: Use a rag as a backing for the screwdriver.
1. Open position: set the stopper to the "up" flow position.
2. Locate the set screw: look under the cap for a small hex or flathead screw.
3. Disassemble: loosen the set screw (do not remove it fully) and unscrew the entire assembly counterclockwise.
These high-capacity systems are common in modern South Florida renovations.
1. Use the hook: most linear drains come with a small metal "lifting key." If missing, a bent coat hanger works.
2. Vertical lift: pull straight up from both ends to avoid jamming the grate against the channel walls.
3. Debris basket: linear drains often have an internal basket; remove and rinse this to restore the 6-8 GPM flow rate [9].
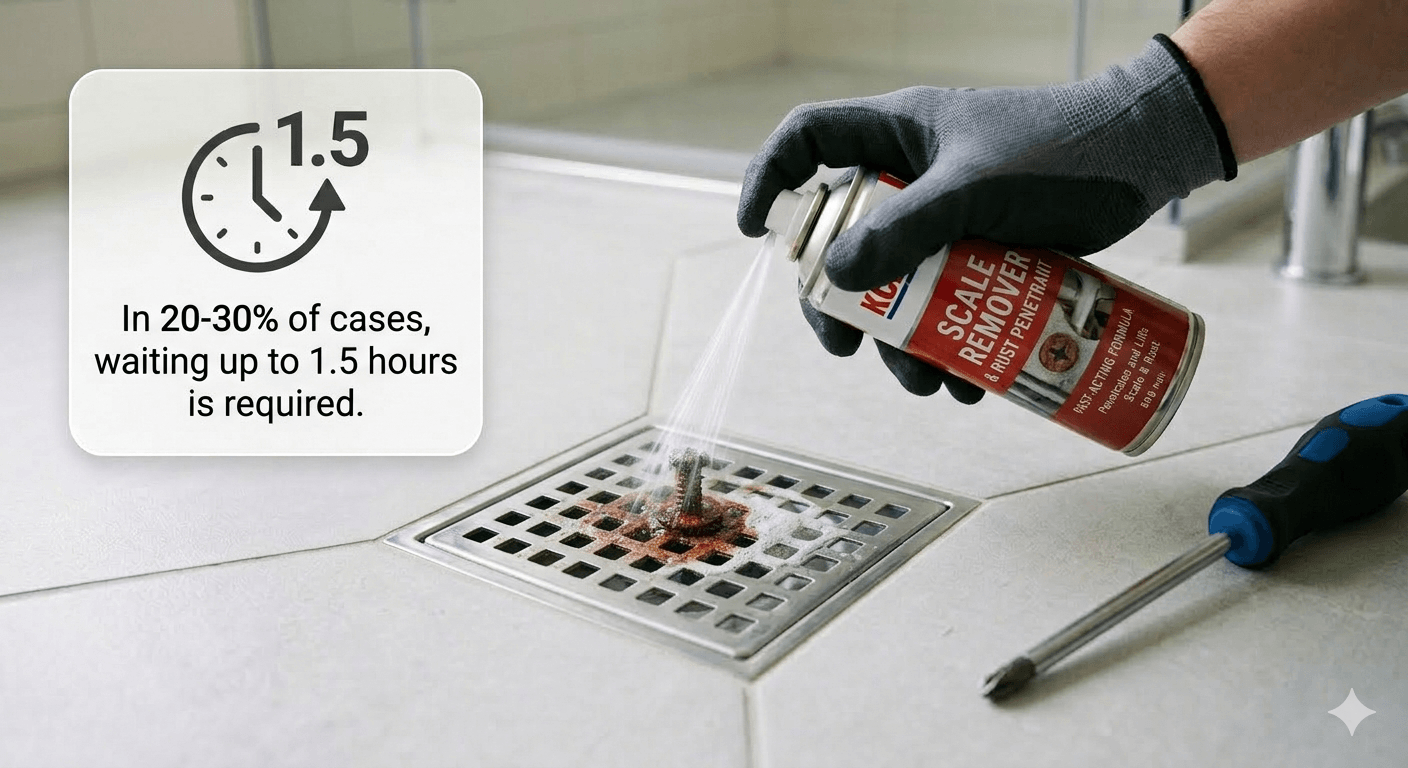
In South Florida, hard water leads to rapid mineral buildup. If a component is seized, we advise against "brute force"—which invariably leads to cracked flanges.
1. Chemical penetration: apply a professional-grade penetrating oil.
2. Wait times: for minor resistance, 15 minutes is sufficient. For significant calcification where the screw is visibly white/crusted, a 90-minute wait is the engineering sweet spot for the oil to reach the threads [6].
3. Acetic acid flush: for heavy calcium scale, a concentrated vinegar solution can dissolve the mineral bond.
4. Sealant removal: use a utility knife to score any grout or epoxy incorrectly applied to the cover edges (a common installation error).
If the screw does not go in: let the chemicals work for 15 minutes.
Continuing beyond these points often results in a $5,000+ subfloor restoration. Stop immediately if:
*At H2Osolutions, we utilize acoustic leak detection and thermal imaging to locate these failures without destructive testing of your tile work.*
While the system is open, we recommend a deep-line flush to ensure the system meets original design specifications [1, 2].
1. Mechanical extraction: use pliers to remove the "hair-and-soap-scum" matrix.
2. Kinetic flush: pour baking soda followed by vinegar. The exothermic (heat-releasing) reaction lasts 4-5 minutes [7], providing chemical agitation that loosens biofilm.
3. Thermal flush: follow with hot water. Warning: PVC piping is rated to 140°F (60°C); exceeding this can soften joints and reduce the pipe's pressure capacity to 20% of its rating [4].
4. Maintenance schedule: we recommend a light cleaning every 30 days and a comprehensive inspection every 6-12 months.
Once the cover is reinstalled, perform a 30-minute leak test [3]. Run the water and monitor for any "gurgling," which indicates an atmospheric venting imbalance.
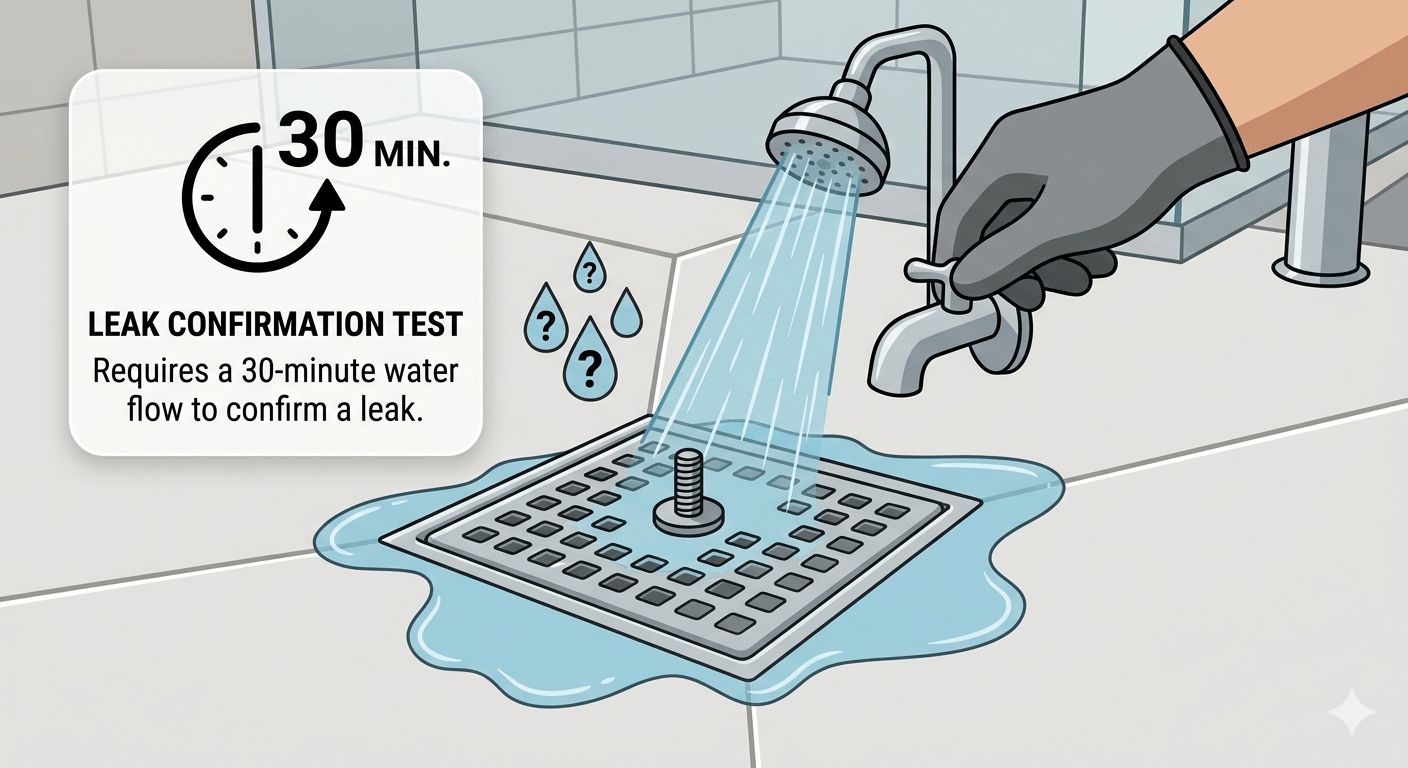
Done! Check for leaks by simply running the water for 2 minutes.
Pro Tip: Before closing the drain, take a high-resolution photo of the interior P-trap with your phone's flash. If you ever need to call a specialist, showing us the "internal state" can save significant time and diagnostic fees.
We understand the frustration of a stubborn drain, but remember: in engineering, knowing when to stop is just as important as knowing how to start. You've taken the right steps to protect your home's infrastructure. If the system resists, it's not a failure on your part—it's the system signaling that it needs professional diagnostic tools to prevent a larger disaster. We are here to ensure your South Florida home remains dry, safe, and functional.
[1] Bedrock Plumbers: Drain snaking and maintenance timeframes.
[2] Horow Guide: Bathtub and Shower drain removal step-by-step.
[3] BPF Pipes Group: Guide to leaktightness testing (2021).
[4] Westlake Pipe: PVC temperature de-rating charts and limits.
[5] Portland Bolt: Stainless steel grade technical FAQs (304 vs 316).
[6] Kroil/PB Blaster: Penetrating oil performance and wait times.
[7] ScienceIsNN: Baking soda/vinegar reaction lab data and durations.
[8] GlobeNewswire: Drain cleaner market insights 2024-2029.
[9] Designerdrains: Ultimate guide to shower drain selection and flow rates.
.png)