H2Osolutions FL I Plumbing Services | Best Miami Plumber
 (786) 627-94-72
H2Osolutions FL I Plumbing Services | Best Miami Plumber
(786) 627-94-72

Whether the culprit is a degraded elastomer (a synthetic rubber seal) or a misaligned float, water is bypassing the primary seal and escaping into the waste line.
In South Florida, where our aging infrastructure and high humidity accelerate material fatigue, leaving this unaddressed is a tactical error. What begins as a "minor" leak quickly evolves into a significant financial drain and an unnecessary tax on our regional water table.
Before disassembling your fixture, we recommend this rapid diagnostic to determine if you should proceed or seek professional intervention:
Data from the EPA (Environmental Protection Agency) indicates that approximately 20% of residential toilets are currently leaking [1]. To a homeowner, it looks like a few ripples; to an engineer, the math is staggering. A standard leak wastes between 200 and 500 gallons of water per day [1].
In extreme cases, such as a fill valve failing to close entirely, losses can reach 4,000 gallons per day—enough to fill a medium-sized swimming pool in less than a week [1].
The Financial Impact in South Florida:
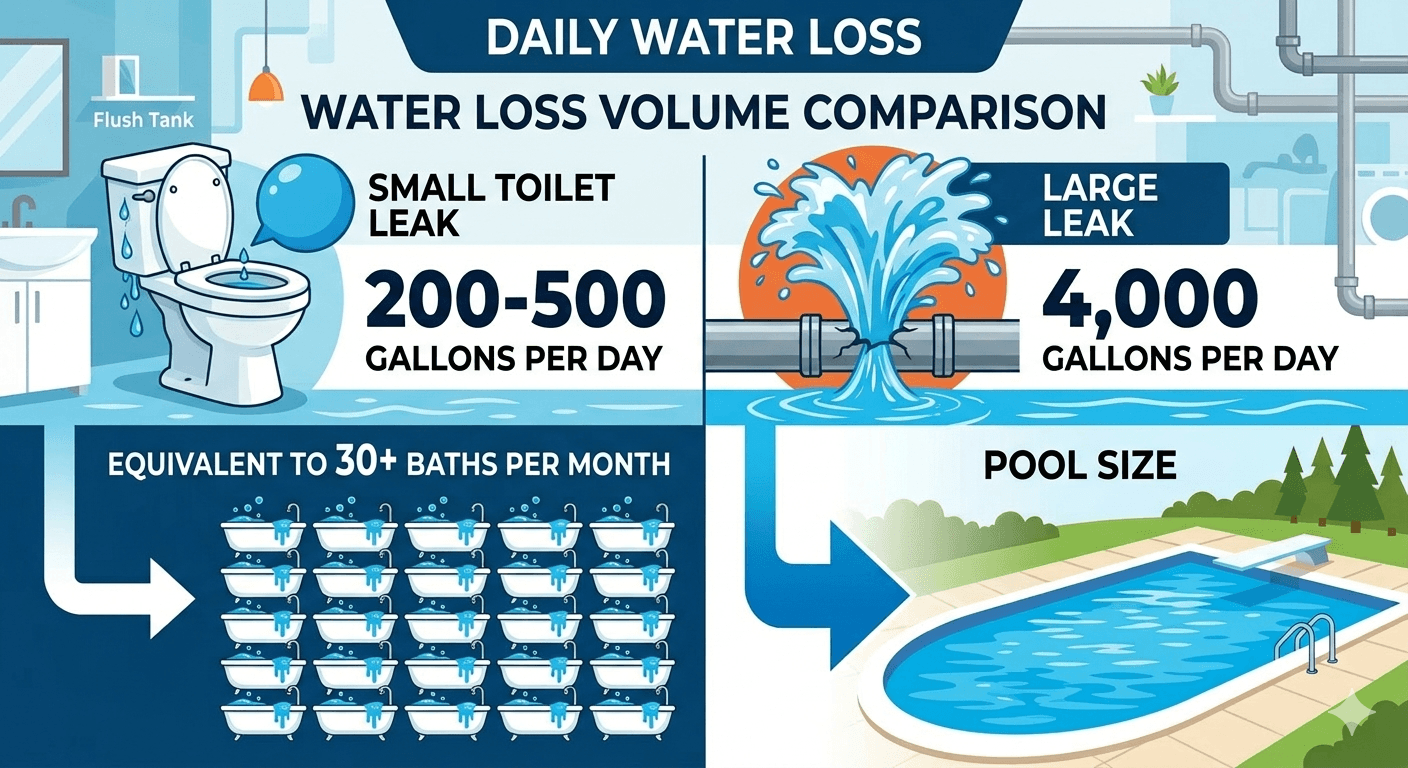
Visualizing the waste: A "silent" leak is often louder than you think when the bill arrives.
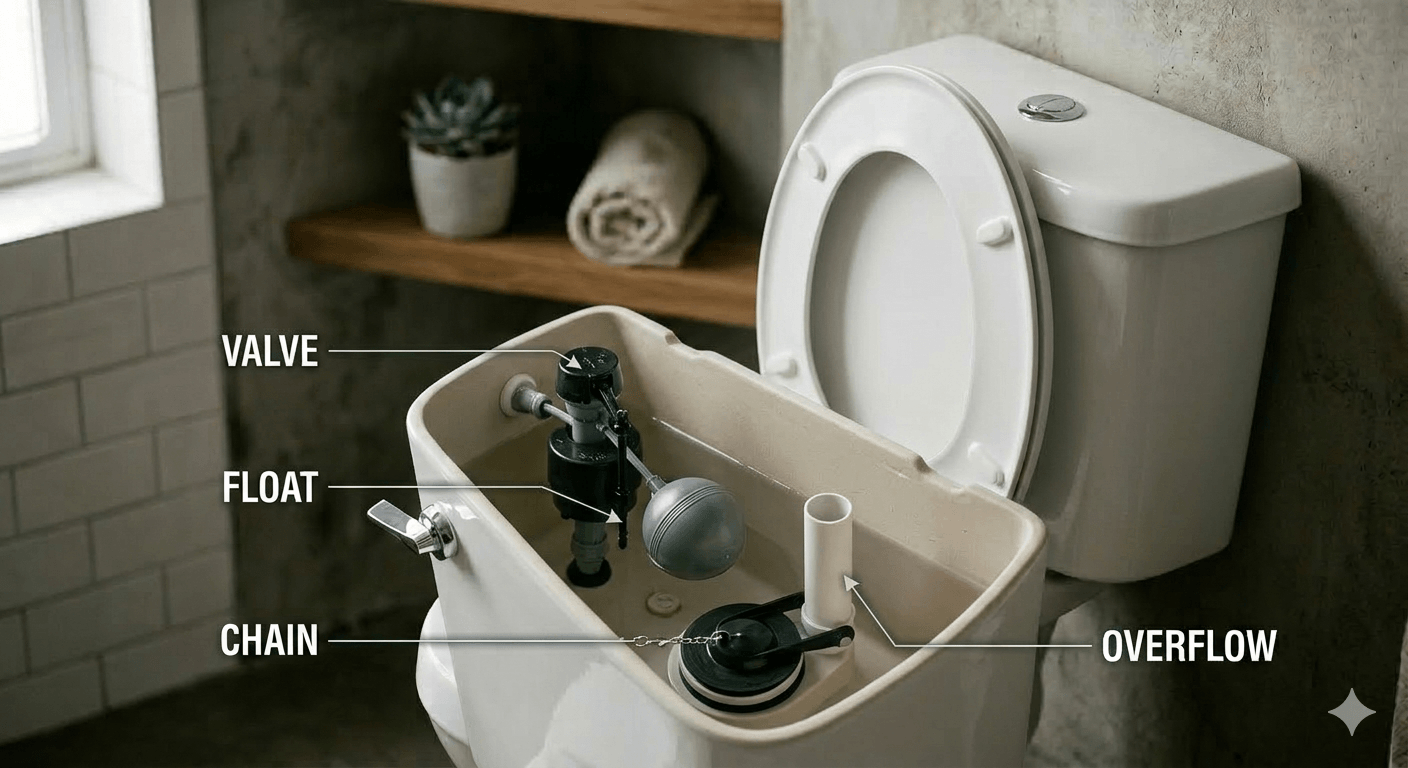
To resolve a failure, we must first understand the buoyancy-and-gravity loop that governs the system. Most North American toilets rely on these core components:
1. Fill Valve: The regulator that controls water entering the tank.
2. Float: The sensor that triggers the fill valve based on water displacement.
3. Flapper (Flush Valve Seal): The primary seal that holds water in the reservoir.
4. Overflow Tube: A safety bypass designed to prevent flood events by directing excess water into the bowl.
5. Lift Chain: The mechanical linkage between the handle and the seal.
Visualizing the waste: A "silent" leak is often louder than you think when the bill arrives.
If you cannot visually identify the leak, use the "Dye Migration Test" to isolate the failure point [1]:
1. Remove the tank lid: Place it safely on a towel. Porcelain is brittle and expensive to replace.
2. Introduce a tracer: Add 5-6 drops of food coloring or a specialized dye tablet into the tank.
3. Dwell Time: Wait 20 minutes. Do not flush.
4. Observation: Inspect the bowl. If the dye has migrated from the tank to the bowl, your flapper is failing to maintain a watertight seat.
If water is constantly spilling into the overflow tube, your "shut-off" height is mis-calibrated.
If the toilet refills periodically when not in use, the flapper is leaking.
A constant hissing indicates the internal diaphragm of the fill valve is fouled by mineral scale or torn.
If the toilet continues to flush or refill without stopping, the mechanical linkage is likely compromised.
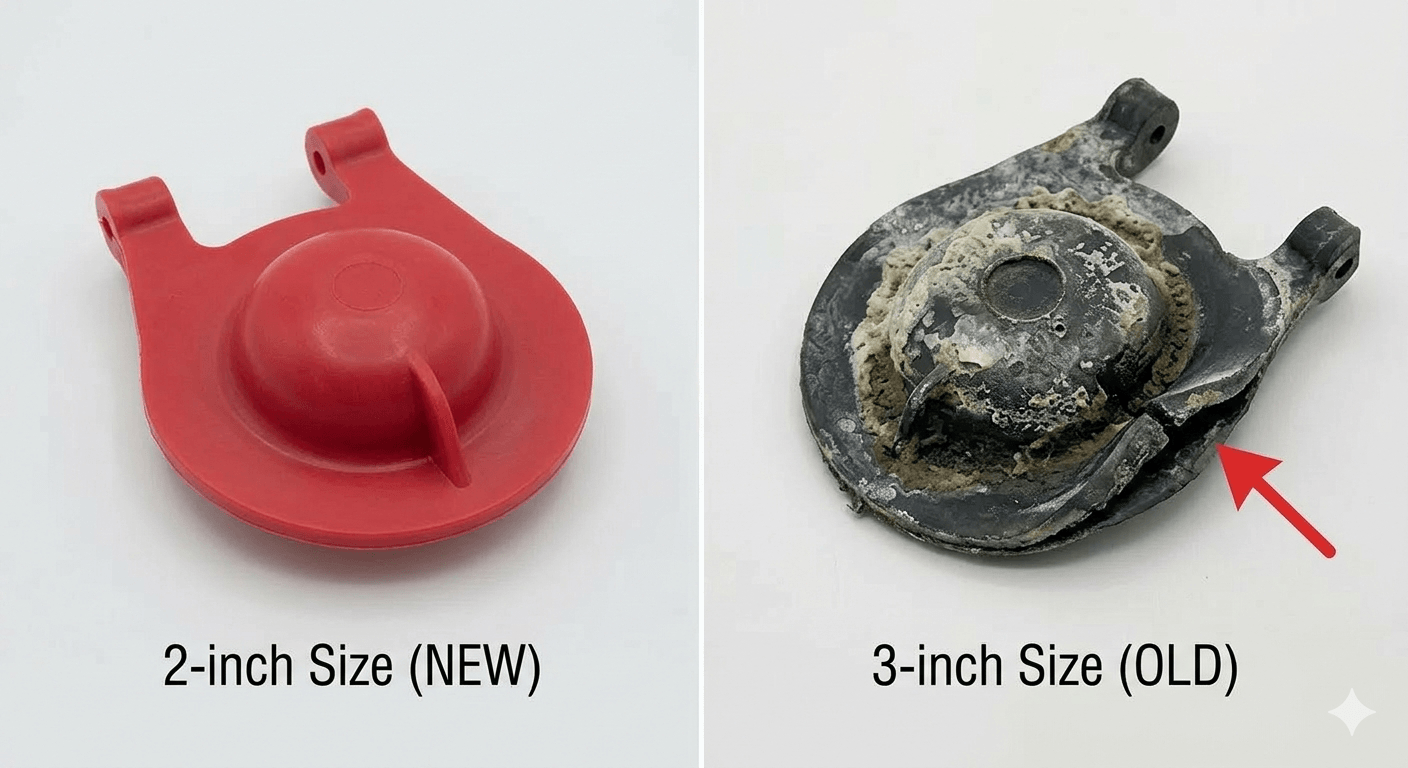
Material degradation: If the rubber feels slimy or looks warped, the seal is compromised.
| Component | Primary Symptom | DIY Difficulty | Est. Time | Estimated Cost |
|---|---|---|---|---|
| Flapper | Water trickling into bowl | 1/10 | 5 min | $5 - $15 [1] |
| Fill Valve | Constant hissing/filling | 4/10 | 15 min | $10 - $30 [1] |
| Lift Chain | Handle feels "loose" | 1/10 | 2 min | $5 - $10 [1] |
Engineer's Note: In South Florida, "hard water" (high mineral content) often causes calcium buildup on the valve seat. A professional cleaning of the seat (approx. $5.50 in materials) can often restore the seal without replacing hardware [2].
If you utilize a Geberit or Grohe wall-hung system, the tank is behind the wall. Access is gained by sliding the flush plate upward and removing the splash guard. These systems are designed for tool-free internal servicing through the actuator opening [1].
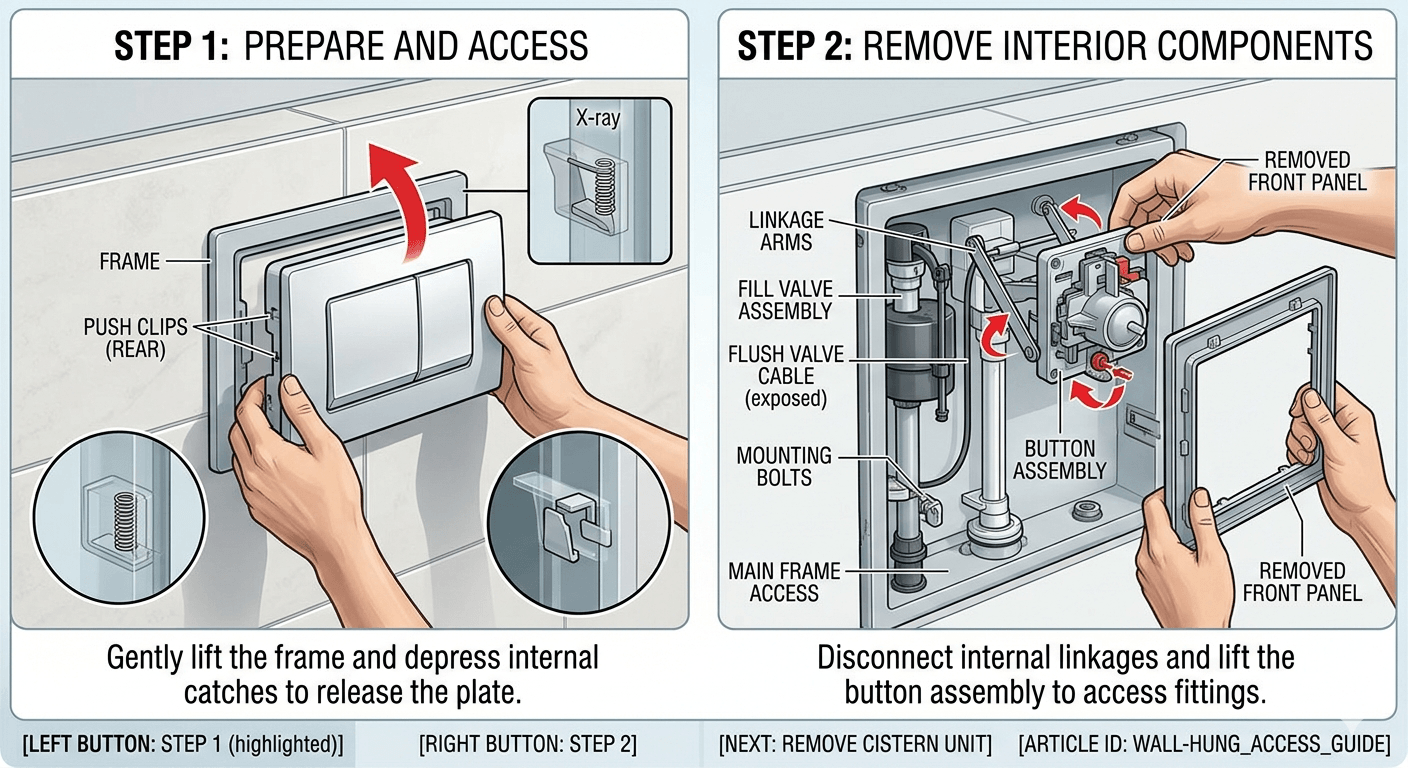
Engineering for maintenance: Accessing concealed components through the actuator plate.
To ensure system longevity, our team recommends:
When hiring a contractor to address persistent issues, we recommend asking three specific questions:
1. "Are you installing a fill valve rated for our local PSI (pounds per square inch) range?"
2. "Will you verify the float height matches the manufacturer's specified GPM (gallons per minute) rating?"
3. "Have you inspected the supply line for signs of galvanic corrosion at the connection point?"
Your home's plumbing is a synchronized system. A small leak is a signal that the system's balance is shifting. By taking ten minutes today to calibrate your fixtures, you aren't just saving money—you are protecting the structural integrity of your South Florida home.
[1] EPA WaterSense Technical Standards and Manufacturer Specifications (Fluidmaster/Korky).
[2] H2Osolutions Internal Knowledge Base: Regional Service Pricing Index.
.png)