H2Osolutions FL I Plumbing Services | Best Miami Plumber
 +1 (786) 627-94-72
H2Osolutions FL I Plumbing Services | Best Miami Plumber
+1 (786) 627-94-72
To protect your home's infrastructure, use this triage protocol to decide between a DIY attempt and a professional intervention:
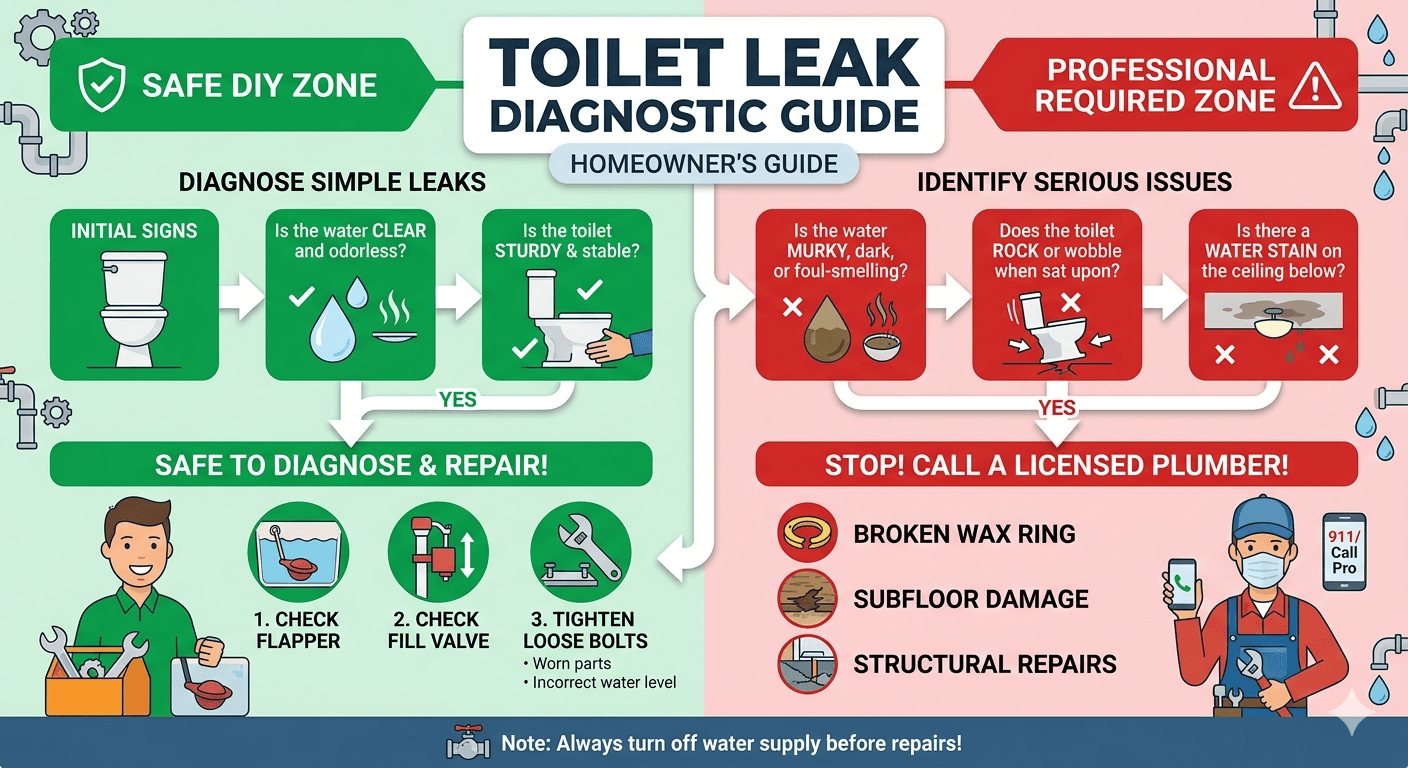
Use this logic tree to determine if your leak is a simple fix or requires a professional engineer's intervention.
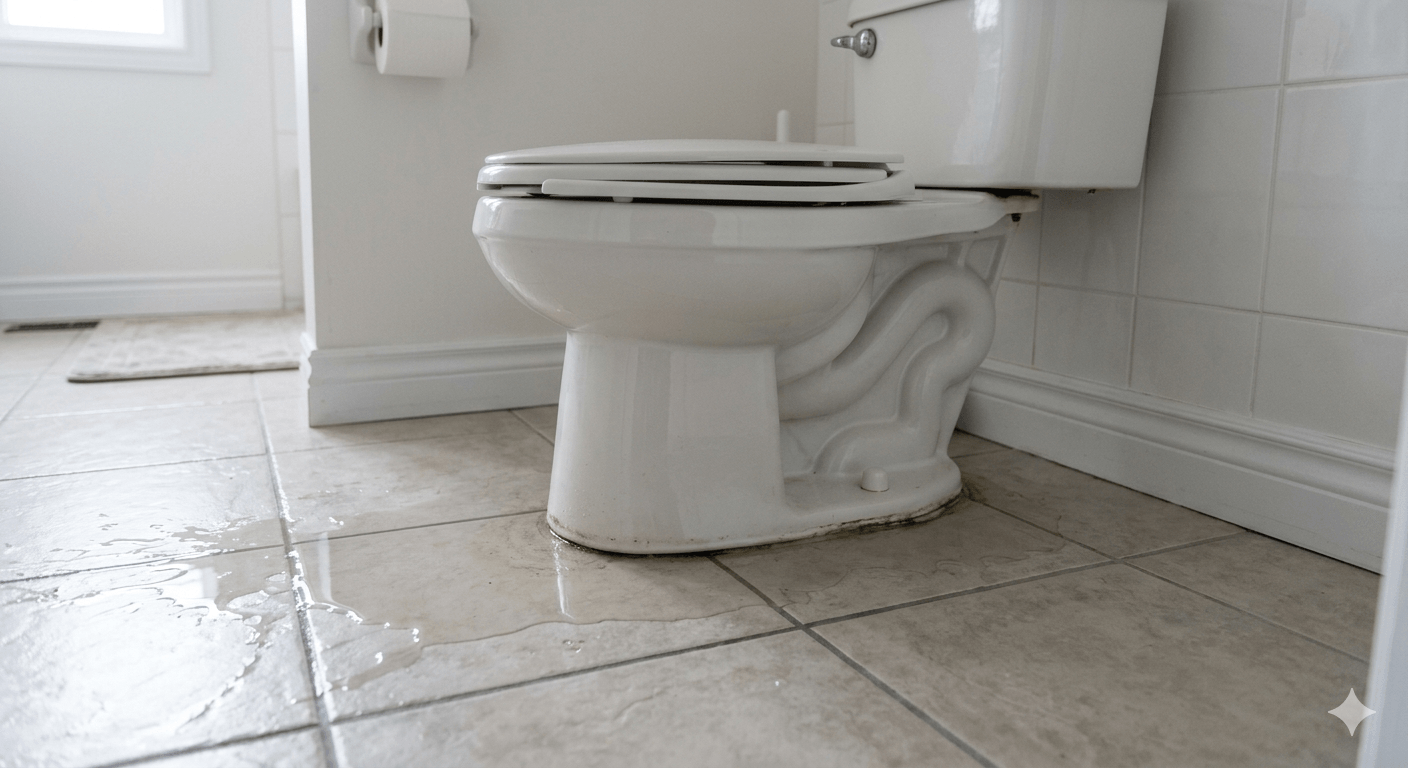
To understand why a toilet leaking at base occurs, we evaluate three primary variables:
The wax ring is a low-tech but critical gasket. However, wax has no "memory" — it is non-resilient. Think of it like fresh asphalt: once you drive ruts into it, they stay there. If the toilet moves due to a loose bolt, the wax compresses but fails to return to its original shape. This creates a permanent gap for sewage effluent and methane gas.
These bolts anchor the vitreous china (porcelain) to the floor-mounted flange. Over time, the vibration of use or galvanic corrosion (a chemical reaction between different metals) can weaken these fasteners. Once tension is lost, the seal is inevitably breached.
In many South Florida renovations, especially from Miami to West Palm Beach, new tile is often laid over old flooring. This raises the floor height, leaving the closet flange "recessed." If the flange sits more than 1/4 inch below the finished floor, a standard wax ring cannot bridge the gap. This is a design flaw, not normal wear; the engineered solution is raising the flange, not simply stacking multiple wax rings.
In our local humidity, cold water entering the tank can lower the porcelain's surface temperature below the dew point. This causes moisture to pull from the air and pool at the base. Maintaining indoor humidity between 30-50% is the engineered solution here [6].
Porcelain is incredibly strong under compression but brittle under tension. Overtightening bolts—exceeding 15-20 foot-pounds (ft-lb) of torque—can cause hairline cracks in the base [1][5]. If a crack reaches the internal trapway, the fixture is functionally dead and must be replaced.
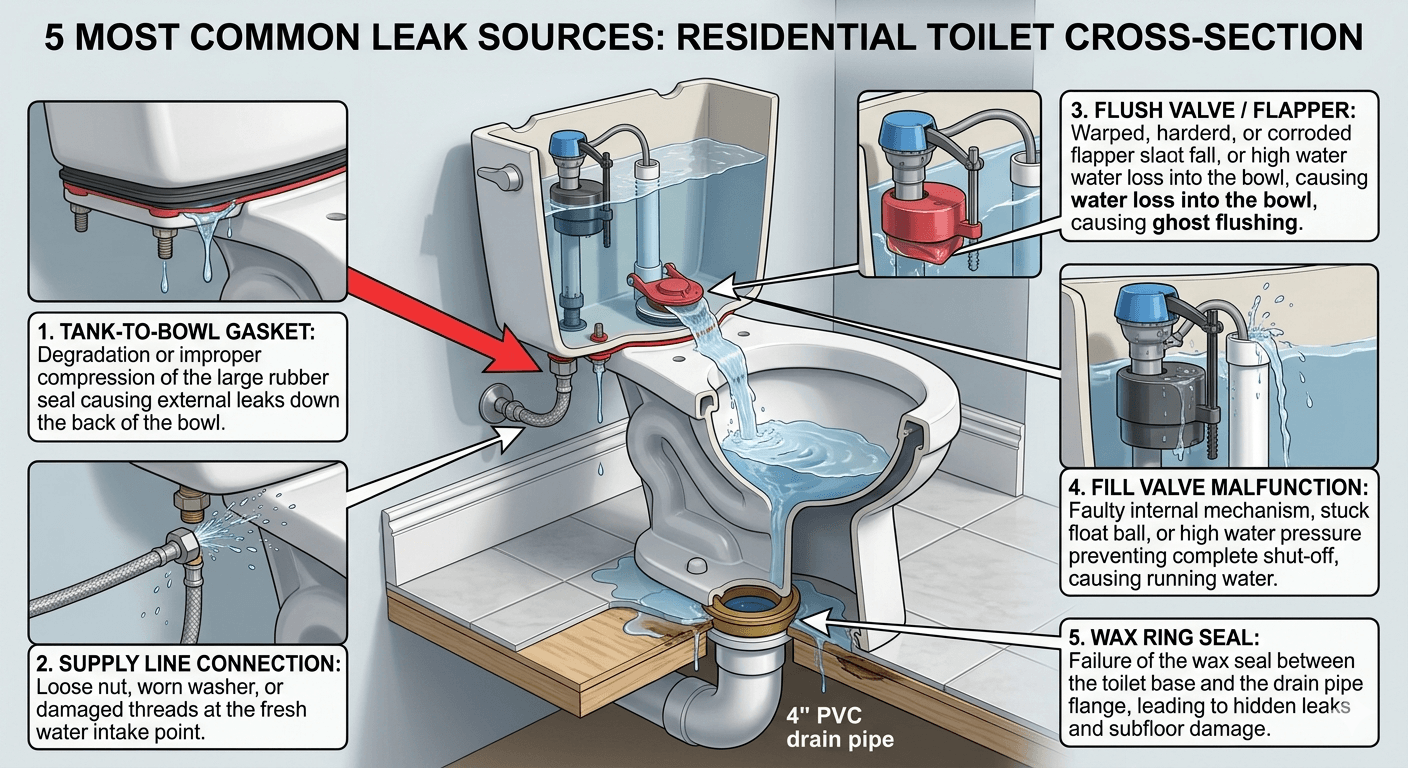
Cross-section analysis of the 5 most common failure points in a standard residential toilet assembly.
| Component | Specification / Purpose |
|---|---|
| Adjustable Wrench | For calibrated tensioning of supply lines and closet bolts. |
| Putty Knife | For total removal of degraded wax (essential for a clean bond). |
| New Wax Ring | Reinforced wax or a modern "waxless" silicone seal [7]. |
| New Supply Line | We recommend replacing the flexible connector during any reset. |
Before pulling the fixture, check the closet bolts. Remove the decorative caps and gently tighten the nuts.
The Engineering Rule: Target 5-10 ft-lb of torque. If the toilet still rocks after tightening, stop. The wax seal is already deformed and must be replaced. Moving to Phase 2 is now mandatory.
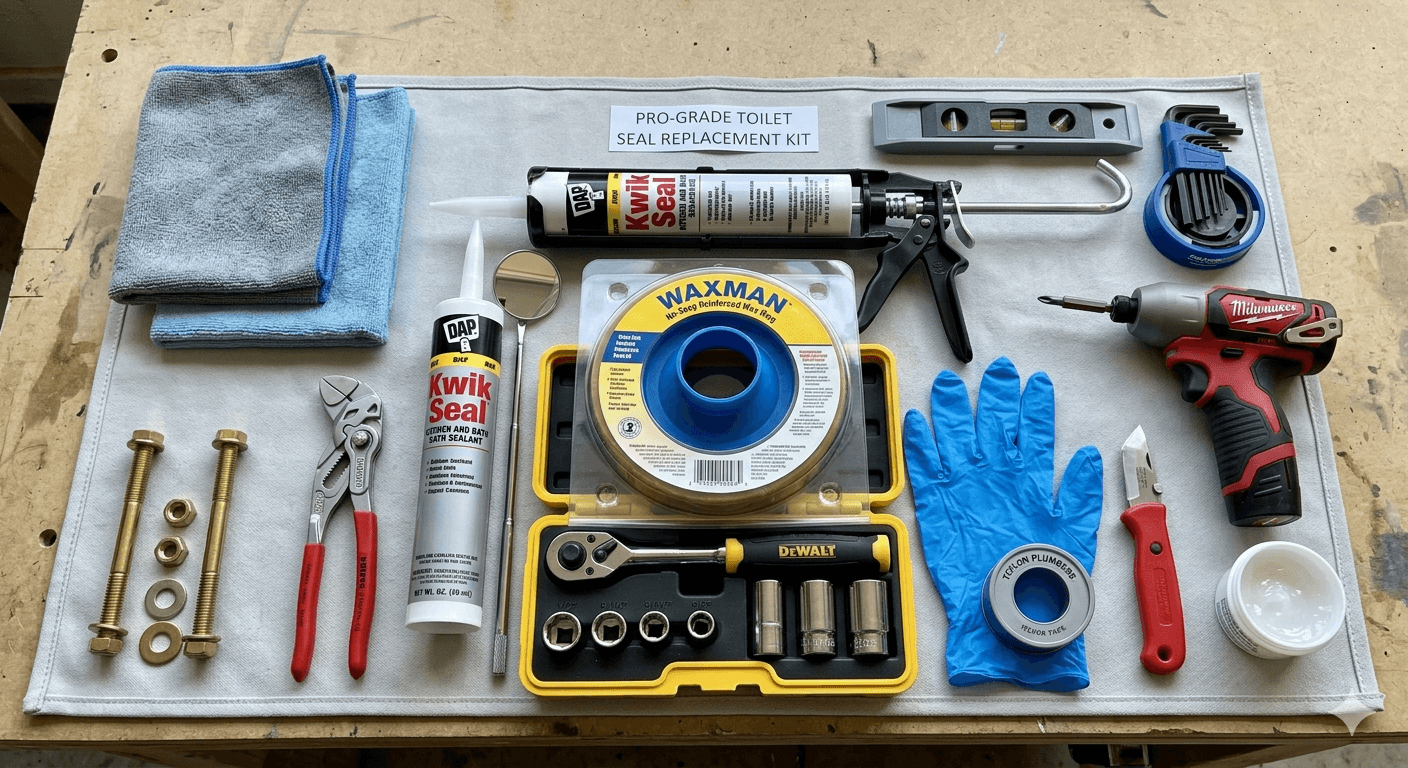
The essential kit for a professional-grade seal replacement.
Ignoring a "small" leak is a high-risk gamble. In the heat of Florida, trapped moisture becomes a laboratory for black mold and wood rot.
We utilize thermal imaging to detect these hidden moisture plumes before they necessitate a full bathroom gut-renovation.
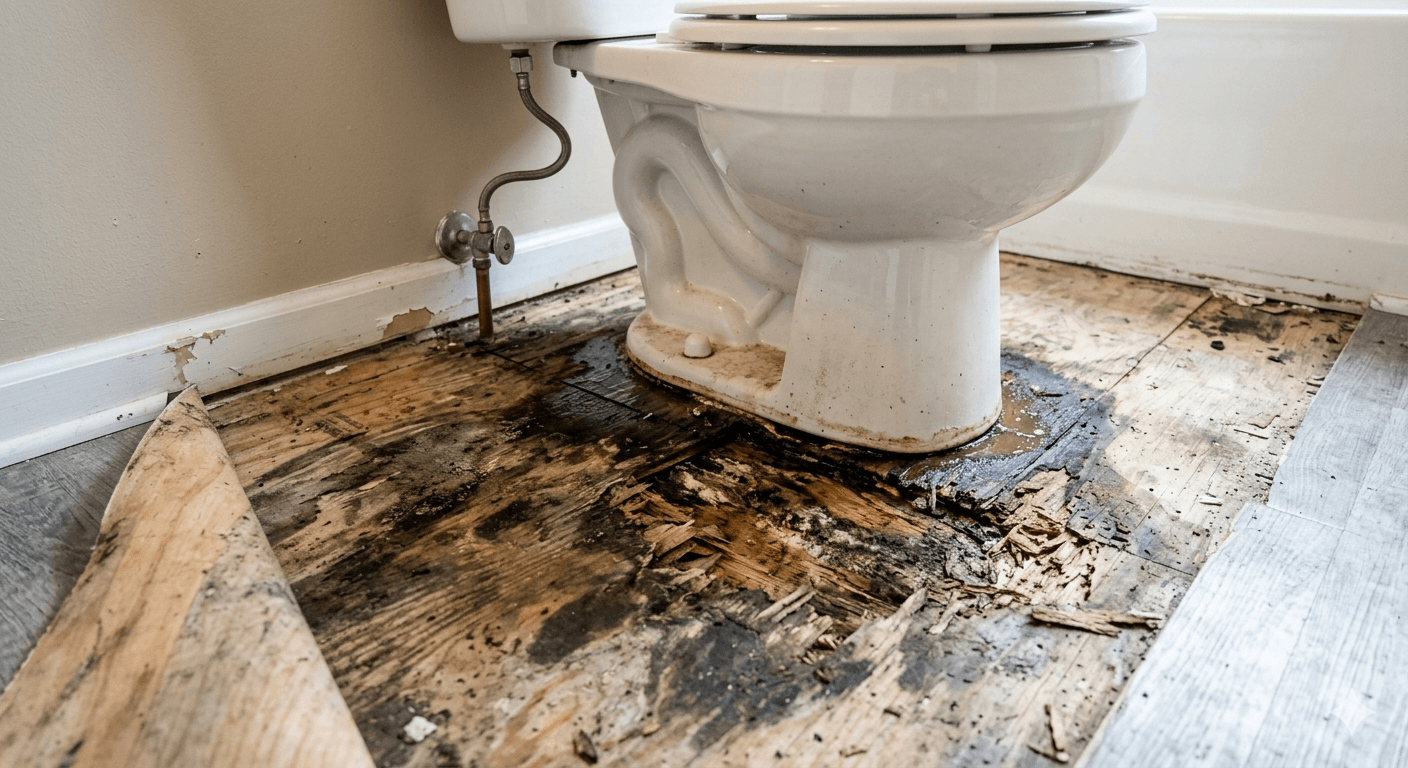
The hidden reality of a "minor" leak: total structural failure of the plywood subfloor.
Once the repair is complete, follow this verification checklist:
The Engineer's Final Word:
Your home is a complex assembly of interlocking systems, and the bathroom is its most vulnerable point of failure. Don't let a $10 part dictate the lifespan of your flooring. If you decide to hire a professional, we recommend asking them these three questions:
If they can't answer those, you haven't found the right specialist yet. Whether you pick up the wrench or the phone, act today — your subfloor will thank you.
[1] How Tight is Too Tight? Toilet Bolt Torque Limits — https://rogerwakefield.com/how-tight-is-too-tight/
[2] Cost to Replace a Toilet Wax Ring (2026 Estimates) — https://www.countbricks.com/post/how-much-for-plumber-to-replace-wax-ring
[3] Oatey 101: Wax Rings Lifespan and Technical Guide — https://www.oatey.com/faqs-blog-videos-case-studies/blog/oatey-101-wax-rings
[4] Building Codes and Energy Certifications for Bath Fans (IRC) — https://www.fantech.net/en-us/expertise/fantech-5-hub/blog/safety/building-codes-and-energy-certifications-for-bath-fans
[5] How to Tighten Toilet Bolts Without Cracking Porcelain — https://www.techwalls.com/how-to-tighten-toilet-bolts-without-cracking-porcelain-base/
[6] EPA Guide to Indoor Air Quality — https://www.epa.gov/indoor-air-quality-iaq/care-your-air-guide-indoor-air-quality
[7] Fluidmaster Better Than Wax Product Data — https://www.homedepot.com/p/Fluidmaster-Better-Than-Wax-Universal-Wax-Free-Toilet-Seal-7530P24/205762183
.png)