H2Osolutions FL I Plumbing Services | Best Miami Plumber
 +1 (786) 627-94-72
H2Osolutions FL I Plumbing Services | Best Miami Plumber
+1 (786) 627-94-72

If standing water is visible, follow this sequence immediately. Do not improvise; the goal is to isolate the energy and the mass (water) to stop active damage. These steps are safe for any homeowner and are designed to prevent the situation from escalating while waiting for a professional.
Locate the cold water inlet pipe (typically marked with a blue ring). Turn the valve clockwise. If it is a ball valve—a valve with a lever handle—turn the lever 90 degrees until it is perpendicular to the pipe. This stops the 40-80 PSI (pounds per square inch) of city pressure from forcing more water through the leak.
In engineering, we categorize leaks by their point of origin. Where the water starts dictates whether the solution is a $20 fitting or a $2,000 system replacement. To identify the source, dry the entire unit with a towel and observe where moisture first reappears.
| Leak Location | Root Cause | Engineering Verdict |
|---|---|---|
| Top (Fittings) | Connection fatigue or galvanic corrosion (deterioration caused by a reaction between two different metals) | Low-cost repair: replace supply lines or nipples. Often a safe DIY task for those with basic tools. |
| Side (T&P Valve) | Thermal expansion or over-pressurization | Critical: replace valve or install an expansion tank. This is a safety issue; do not cap this valve. |
| Bottom (Internal) | Breach of the glass-lined steel tank | Terminal failure: the unit must be replaced. Internal tank shells cannot be welded or patched reliably. |
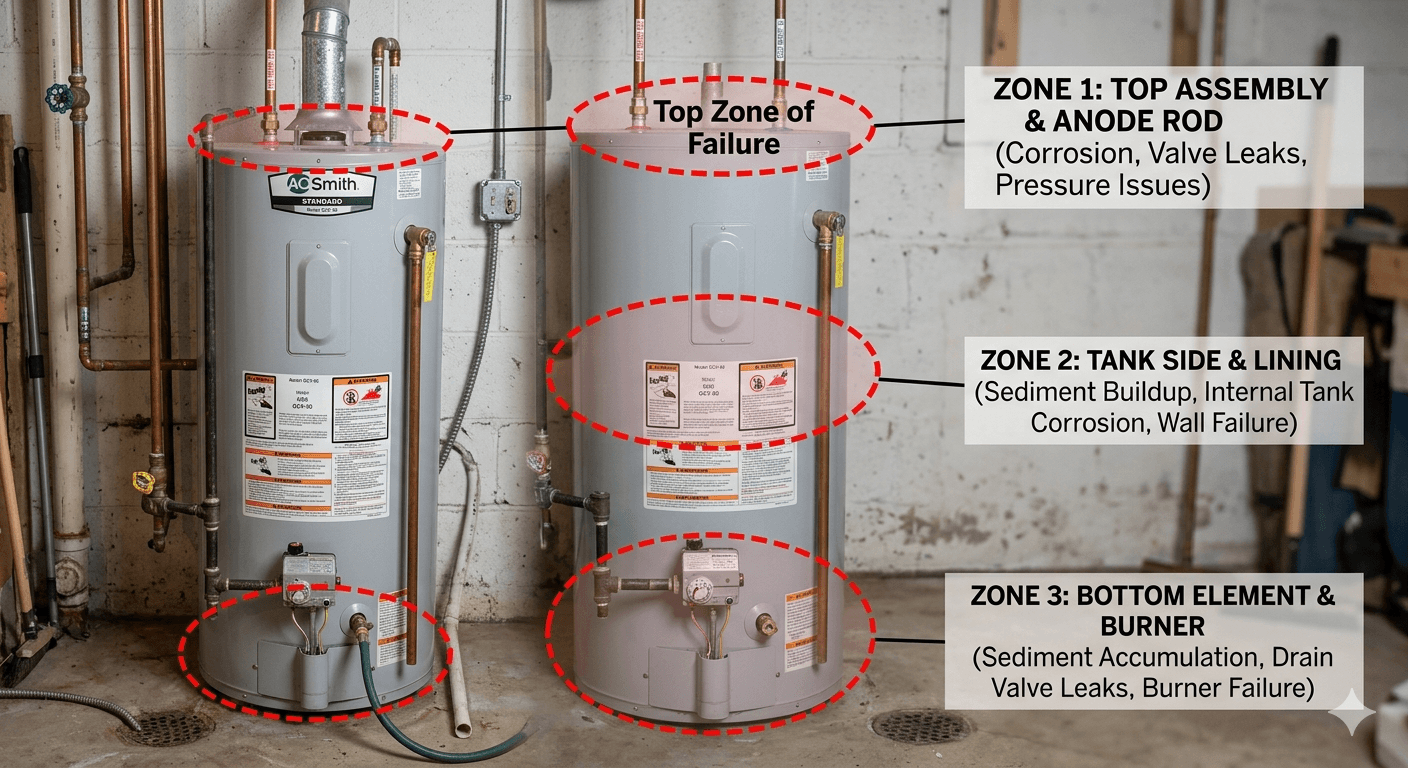
Diagnostic mapping: the origin of the water dictates your financial strategy.
Plumbing systems do not fail at random; they fail because of physics. В South Florida, our unique water chemistry and high ambient heat accelerate these processes.
Water is incompressible. When heated, it expands. If a home has a "closed system" (common in modern Florida builds with check valves), that expanding water has nowhere to go. This spikes the internal pressure. Per residential standards like the Florida Building Code, a system should never exceed 80 PSI (0.55 MPa) [1]. Constant cycling above this limit fatigues the tank's welded seams until they weep.
Inside the tank hangs a Magnesium or Aluminum rod. Its sole job is to be destroyed. Through a process called electrolysis, the water attacks this rod instead of the steel tank. Once that rod is depleted—usually within 1-2 years [5]—the water begins eating the tank from the inside out. In areas with water hardness exceeding 300 mg/L, this corrosion process occurs 30-40% faster [4].
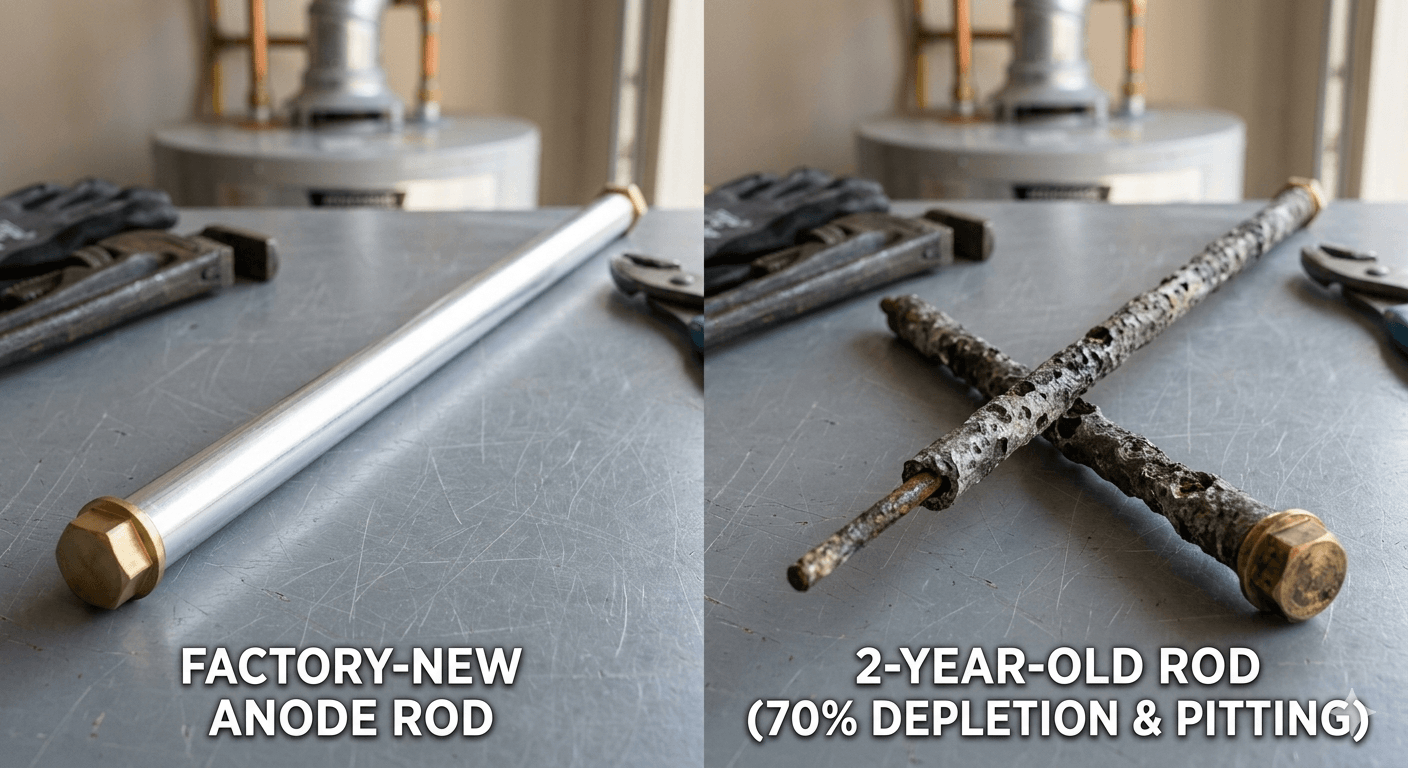
The anode rod: your only line of defense against tank wall perforation.
Most contractors will attempt to sell a new unit immediately. At H2Osolutions, we use the 30% Rule: if the cost of the repair exceeds 30% of the cost of a new, warrantied system, the investment in the old unit is mathematically unsound [4].
Decision Matrix: If a unit is 10 years old and requires a $600 repair, but a new installation is $1,500, the repair exceeds the 30% threshold. Replacement is the engineered recommendation.
When a technician arrives, do not just ask "How much?" Ask the questions that reveal their competence:
To maximize the ROI (Return on Investment) of plumbing infrastructure, follow this annual checklist:
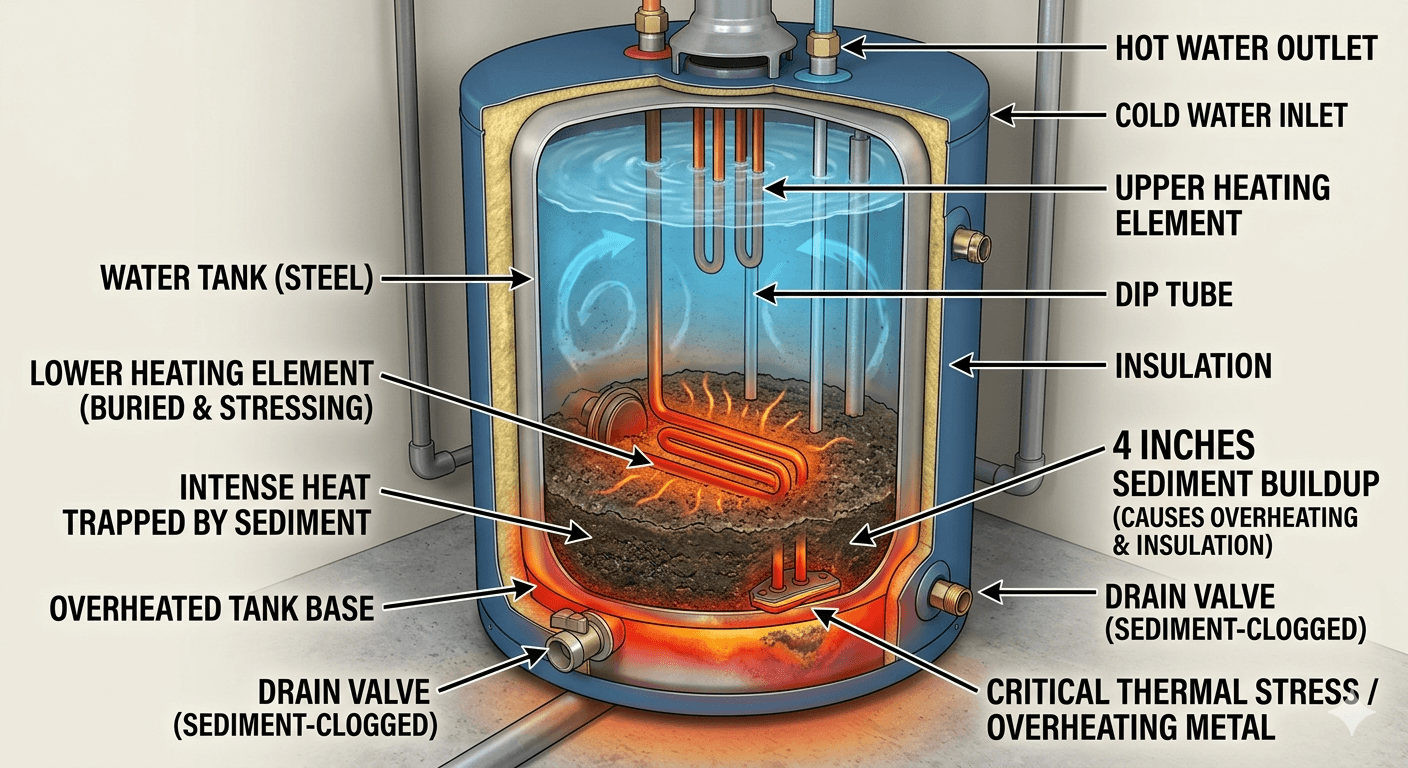
Sediment buildup: the "silent killer" of energy efficiency and tank longevity.
A leaking water heater feels like a race against the clock, but once the power is cut and the water is isolated, the "emergency" is over. You have transitioned from a victim of a plumbing failure to a manager of a technical repair. Whether you are simply replacing a supply line or commissioning a full system upgrade, remember that your home's safety depends on following the physics, not the shortcuts. We have seen thousands of these units across South Florida; with the right diagnosis, you will navigate this without unnecessary expense.
[1] Florida Building Code (FBC) - Residential Plumbing Standards.
[2] Water Heater Repair Cost 2026 (Angi/HomeAdvisor) — https://www.angi.com/articles/water-heater-repair-cost.htm
[3] Installation Costs Regional Analysis — https://profi.ru
[4] Lifespan and Replacement Rules — https://www.consumeraffairs.com/homeowners/water-heater-lifespan.html
[5] Anode Rod Maintenance and Electrolysis — https://gaspart.online
.png)